 |
| Access is denied Asp.net MVC Application on VS2012 |
In this article i'm going to explain how to resolve the "Access is denied " in Asp.Net MVC application. please follow these steps to resolve the riddle:
- Select the project in your Solution Explorer.
- Click on the properties tab in the bottom or simple press (F4) in your keyboard.
- Set "Anonymous Authentication" to "Disabled".
- Set "Windows Authentication" to "Enabled".
1. Go to Solution Explorer and click on the project
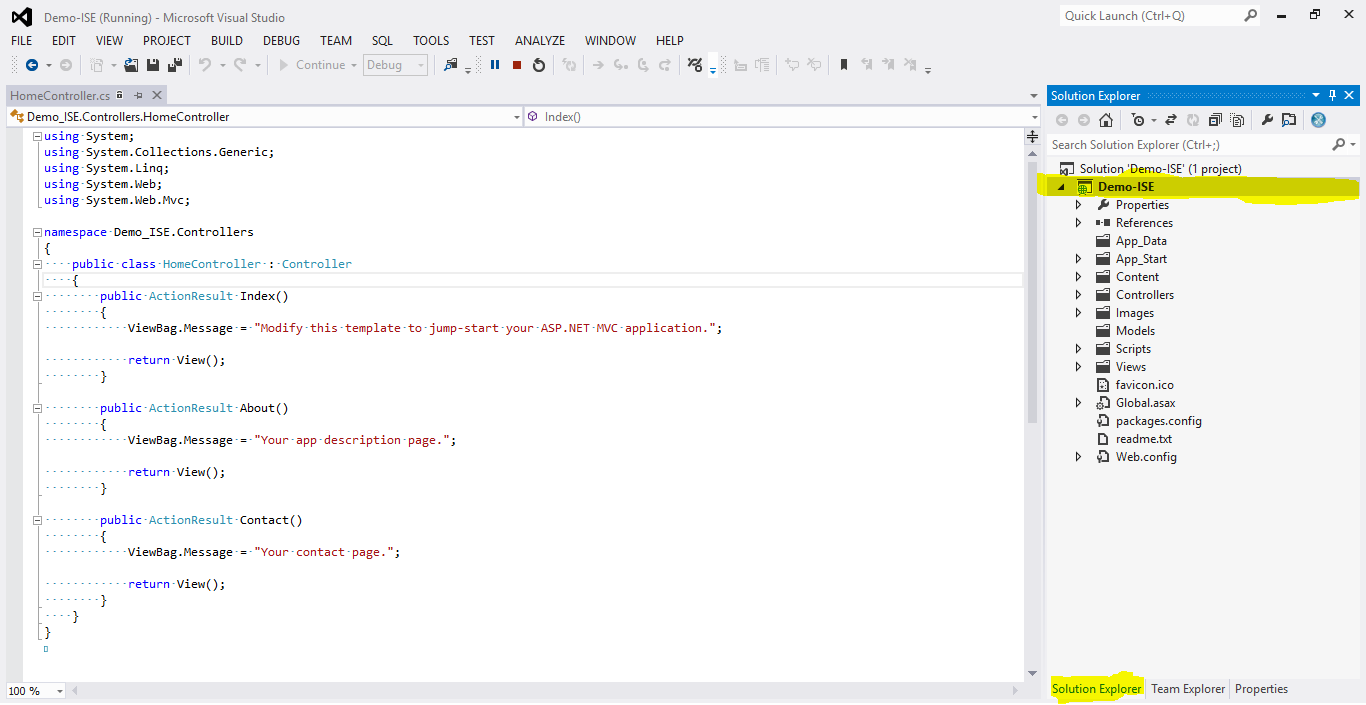 |
| 1. Go to Solution Explorer and click on the project |
2. Click on the properties tab in the bottom or simply press (F4)
 |
| 2. Click on the properties tab in the bottom or simply press(F4) |
3. In the Properties pane set "Anonymous Authentication" to "Disabled"
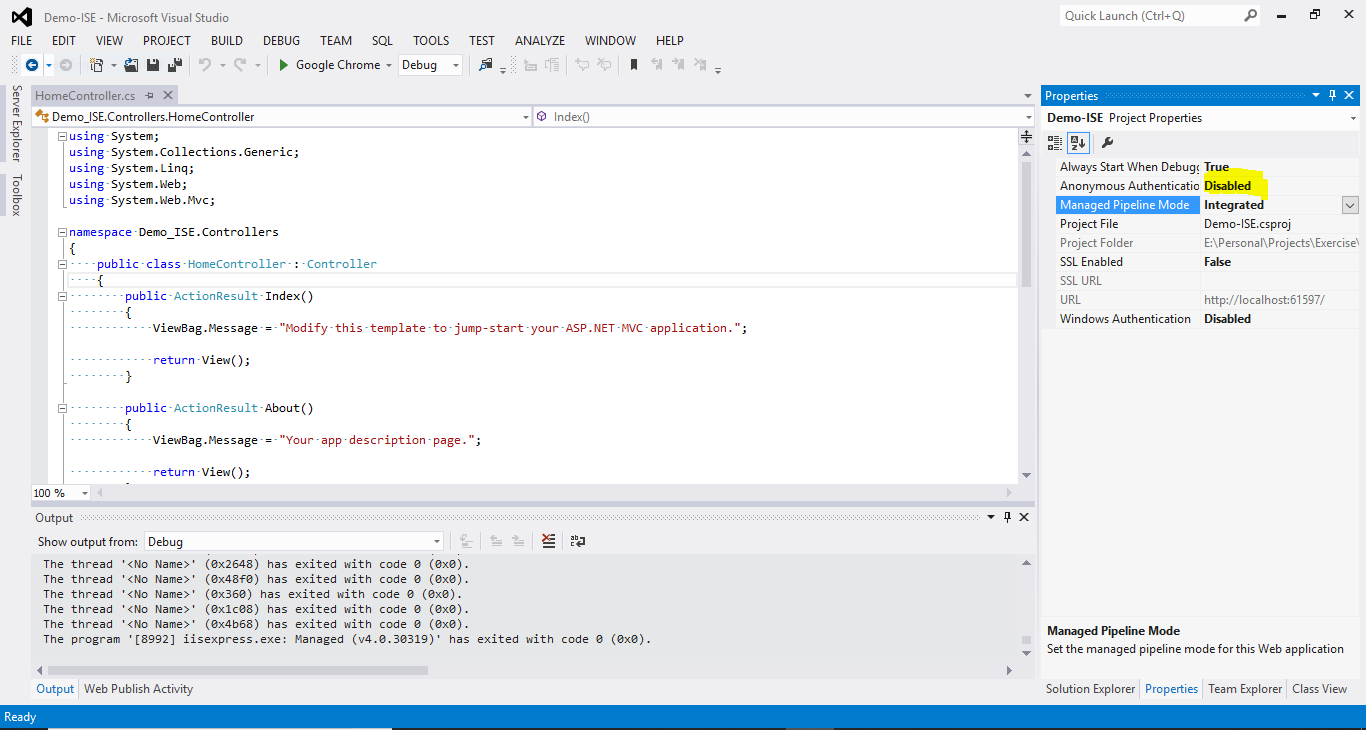 |
| 3. In the properties pane set "Anonymous Authentication" to "Disabled" |
4. In the Properties pane set "Windows Authentication" to "Enabled"
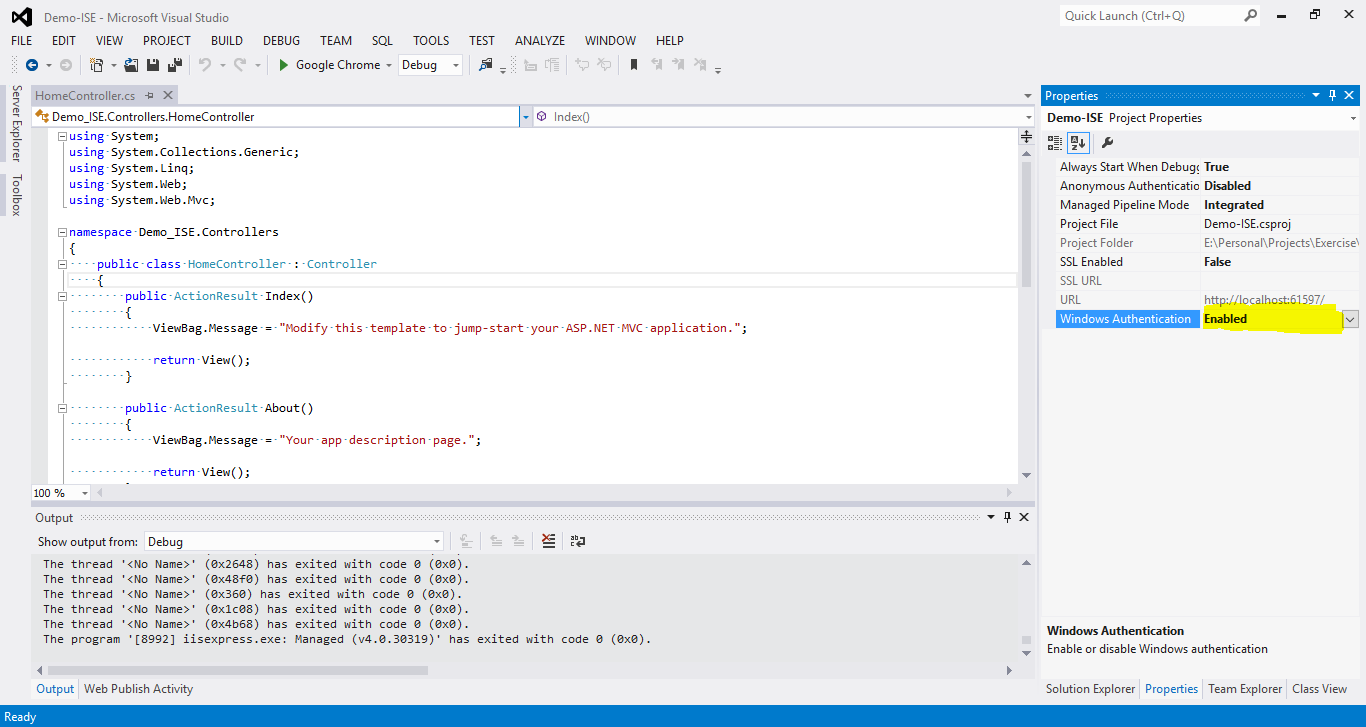 |
| 4. In the properties pane set "Windows Authentication" to "Enabled" |
Next, restart your application this riddle will be resolved. You are good to go.
If you wonder what is the Anonymous and Windows authentication, you can see in details below,
Anonymous Authentication
The Anonymous Authentication element controls how Internet Information Services (IIS) processes requests from anonymous users. you can modify the <anonymousAuthentication> element to disable Anonymous authentication either in web.config file or properties pane, or you can configure Internet Information Services (IIS) to use a custom user account to process anonymous requests.
Basically, Anonymous authentication gives users access to the public areas of your website across online or FTP site without prompting them for a user name or password to access the website. By default, the IUSR account, is used to allow anonymous access. You must disable Anonymous authentication for any Website, Web application or Web services for which you want to enable other authentication methods such as Basic or Windows authentication. In case if you like to learn more about Anonymous authentication, you can visit here.
Windows Authentication
The Windows authentication element defines configuration settings for the Internet Information Services (IIS) Windows authentication module. You can use Windows authentication when your IIS server runs on a corporate network that is using Microsoft Active Directory service domain identities or other windows account to identify users. Because of this, you can use Windows authentication whether or not your server is a member of an Active Directory domain.
Windows authentication is a secure form of authentication because the user name and password are hashed before being sent across the network. When you enable the Windows authentication, the client browser sends a strongly hashed version of the password in a cryptographic exchange with your Web server.
Comments